


With your first baby, it seems like you receive all these adorable, personalized items to help you celebrate your new arrival, but by the time you’re ready for your 2nd, that personal touch has gone and the gift of diapers have taken their place.
There’s nothing wrong with diapers! But, if you’re like me, I found that I was just as excited for Baby #2’s arrival and had nothing personal to get excited about. My sweet Baby Boy #2 was going to be reusing the same burp cloths with my son’s name on them. Diaper bags and Thirty-One sacks would all be labeled with “Mark” instead of “Zach;” which I can only imagine will be confusing for our church nursery or MOPS childcare.
I’ve accepted that this is just reality. I’m not going to pay $8+ for a burp cloth on Etsy just so my newborn can feel loved too. After all, I’m a pro at this “mom” thing now, and I know how silly some of these items are. . . but there was one gift I received with my first son, I just couldn’t resist recreating for Baby #2.
With my first son, a sweet friend (Megan) created this Hospital Door Hanger for us to take with us when we delivered.
I had never seen or heard of this before, but it was one of the first items I’d received with my son’s name on it, and it made it all that much more special!
We took it with pride to the hospital, and when my son was born, proudly filled out the information and hung it on our door outside of our recovery room. The nurses all complimented how cute it was, and how convenient it was to know our son’s name before they walked through the door.
And since then, we had it hanging in his nursery and used it as a cork board to tack up special photos and keepsakes as they came up over the first year.
As we were clearing out and getting our nursery ready again for our 2nd son, I decided instead of feeling sad that I wasn’t going to receive one for Baby Boy #2, I came to the decision that I’d just make one for him myself!
And it was so EASY to do, I’m glad I did!
This is such a simple idea to do for your child-on-the-way or as a shower gift. Here’s a quick guide on how to make one yourself:
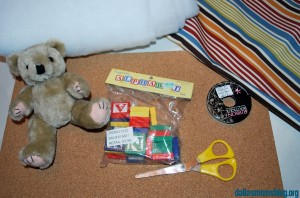 Supplies: I purchased everything I needed at Hobby Lobby, but you could probably find it all at your nearest craft store too. You’ll need a cork board designed for mounting (I used an 11″x17″.), fabric of your choosing (the thicker the better), quilt batting, ribbon to match your fabric, scissors, hot glue gun & glue sticks, craft staple gun, letters for the name, a teddy bear or other decoration, scrapbook paper, push pins, & a pen.
My cost for all these items was under $25 with a Hobby Lobby coupon. I also had to purchase 2 packages of the Alphabet Magnet Letters since my son’s name required multiples of the same letter – but feel free to get creative to stay within your own budget!
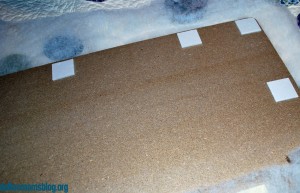 Step 1: Wrap your cork board with the quilt batting. Leave about 1 inch around the backside, and cut the excess off. Use the mounting squares to help you attach the batting before using the staple gun to permanently hold in place.
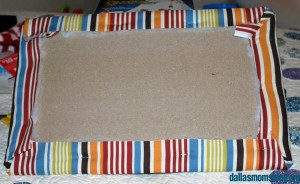 Step 2: Wrap your fabric over the batting, and use the staple gun to attach the batting and fabric to your board. It’s important to use a craft staple gun with staples that are meant for light work. You might still feel the staples through the fabric if you use staples that are too large or industrial. If this is a concern, add extra batting or use thicker fabric.
Make sure if you’re using fabric with stripes or patterns that you’re keeping it straight as you staple. There’s nothing more annoying than fabric that looks crooked!
Trim the excess off the back once you’ve finished your stapling.
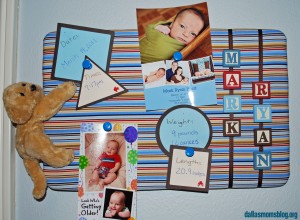
Step 3: Add your decorations! I used hot glue to attach my ribbon and alphabet letters. I also used the hot glue gun to attach the teddy bear after I added a little ribbon embellishment around his neck. I then used the staple gun and hot glue to attach a hanger made of ribbon along the back upper 1/3rd of the board.
Step 4: Using scrapbook paper to match my fabric and a sharpie marker, I made shapes to write down the birth information; Date, Time of delivery, Weight, and Length, then used the push pins to attach them to the board.
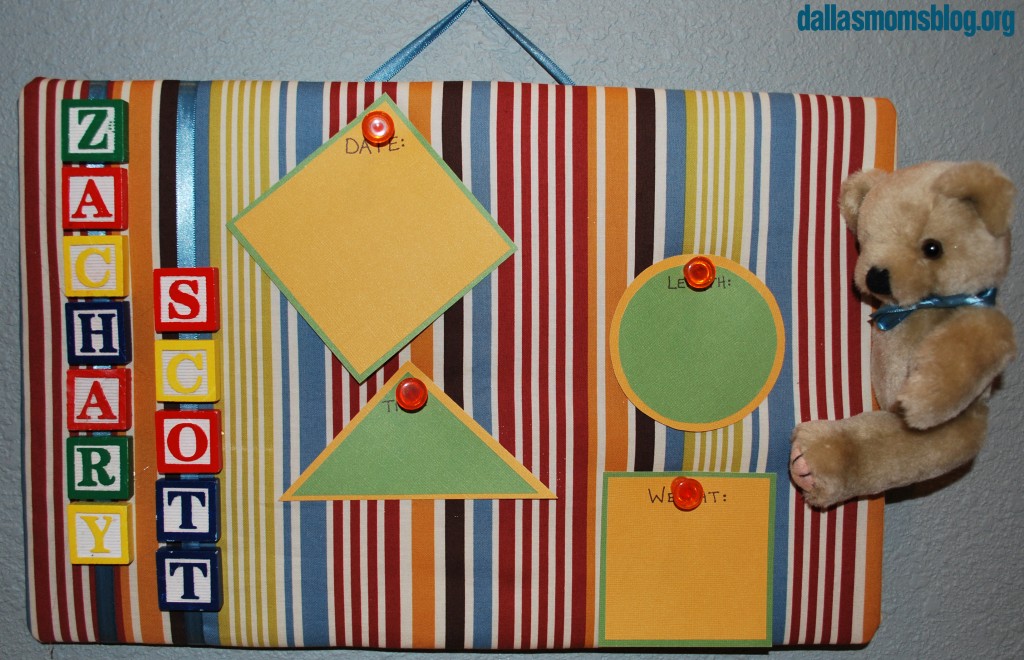
I’m not an extremely creative person, but the possibilities of how to decorate this door hanger are endless! If I were doing this as a gift, I’m sure I would have put a lot more time and energy into making this ridiculously cute, but since it’s for me (and I’m 38 weeks pregnant!) I was pretty happy with the results!
Now, it’s sitting next to my hospital bag ready to go, and I’m so excited to have something personalized and NOT a hand-me-down for my sweet Baby Boy whenever he arrives!


Krystal, so sweet! I love how your sign turned out. I’ll be delivering at Baylor Dallas in a couple of weeks. I have made a name sign, but I’m not sure how to attach it to the door. Do the doors have hooks? Any suggestions? Thanks in advance!
I delivered at Presby Plano and all of the rooms had a hanger on the door. I believe it’s pretty standard now at most hospitals. Good Luck!