


I’m going to go out on a limb and say I’m crafty. I mean, if I actually manage to pick a project, buy the supplies and then proceed to spend way too much time cursing at the glue gun, then yeah, I’m crafty. The end result is often rockin’ but the process to get there ain’t pretty.
But Isn’t That What Art Is All About?
Since having the kiddos, it’s been a lot of fun to let our creative juices flow and I have to admit, lately, our arts and craft bin is looking awesome. We have collected just about everything necessary to make amazing DIY Crafts in a Pintrest-sort-of-way. When we actually get pumped up for a project, it’s a blast and I always think “Why don’t we do this more often?” Then I turn around and the mess reminds me of why we only do it so often.
But honestly, from sensory bins to wreaths and leaf art there are so many amazing ideas floating around and it’s a cinch to set up a crafting afternoon and totally celebrate the season.
It was pretty hard to pick one project, but we did. We decided to make glitter leaves this time around, and boy was it fun! Here are some basic steps for you and the kiddos. Just grab the few materials needed and end up with a dazzling display of nature everyone will adore.

 Take A Walk
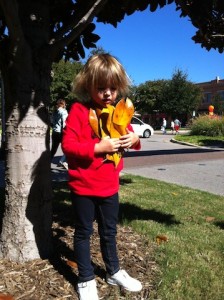
First thing’s first, you’ll be needing leaves– the more varied the shapes and sizes the better!
We went out and found magnolia leaves, oak leaves and more. The varied shapes makes the art more interesting and it’s also a lot of fun for kids to play an active role in gathering the supplies.
FYI: It’s helpful to properly book press the leaves before painting but as it can take almost two weeks before they are ready to go, we opted to let them dry in the open and decorate after a few days.
Grab The Gear
There are only a few ingredients needed to making a dazzling display for the Fall season.
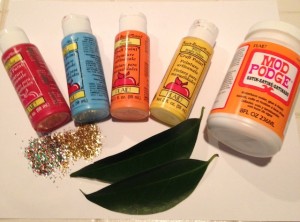 Leaves: Which are fully dried and/or pressed and ready to go.
- Glitter: The finer the better but anything on hand will do the trick.
- Glue: I love using Modge Podge, the must-have adhesive of crafters everywhere. Elmer’s Glue works just as well and is also fun for creating doodles and designs.
- Paint: We had some tempra paint and used that in place of glue on some leaves.
- Metallic Markers: Probably best left to the older kiddos, grab a set of gold and silver at the local arts and crafts store and let imagination run free.
The Guide-To-Glittering
 After laying down some cardboard or protective covering for the workspace, let the kids paint, design or glue whatever they’d like and then provide small amounts of glitter to be sprinkled on the sticky areas.
And That’s It!!!
Be sure to lay the finished product in hands-off place to allow for full drying potential.
Other crafty bloggers out there have provided super amazing step-by-step tutorials on creating Glitter Leaves. This post is MY version of a project enjoyed with my kiddos.
Feel free to offer up tips or suggestions in the comments on how to make this an even better craft!
Be sure to share your fall #DMBDIY with us on Instagram and Twitter.


